
Medically Reviewed
This article has been reviewed for clinical accuracy.
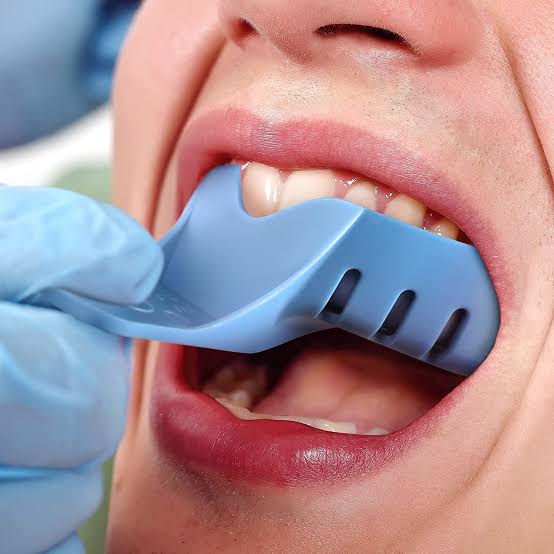
Impression trays are used in conjunction with various types of materials to take imprints of the patient’s dentition. The type of tray chosen depends on the type of impression needed and the procedure that is indicated.
USES AND FEATURES OF IMPRESSION TRAYS
- Used to hold impression material
- Can be perforated for better retention
- Have a handle for better grasp during placement and removal
- Dentate impression trays – for patients with teeth
- Edentulous impression trays – for patients with no teeth
5 TYPES OF IMPRESSION TRAYS
- Metal perforated type trays
- Plastic-type/stock tray
- The universal sectional impression tray
- Custom tray/special tray
- Triple tray.
Metal perforated type trays

Features
- Autoclavable
- Available in different sizes (denoted by numbers)
- Not easily adapted
- Available as solid metal trays
Plastic-type/stock tray

Features
- Disposable, single-use
- A tray adhesive may be used for added retention of impression material
- Available in different sizes (denoted by colours)
- Can be adapted using a heat source
The universal sectional impression tray

Used and features
- The modified tray used to take an impression of a specific area of the mouth
- Maybe perforated for retention
- Fabricated from flexible metal – adaptable
- Only suitable for dentate patients
- Autoclavable
Custom tray/special tray

Features
- Fabricated from a plaster model of the patient’s dentate or edentulous arches
- Fabricated from an acrylic material
- Disposable, single-use
- Must be ‘painted’ with tray adhesive for retention of impression material
Triple tray

Uses and features
- Used to take an impression of both arches simultaneously
- Fabricated from a combination of plastic and flexible webbing material
- Many different sizes available (anterior, posterior, quadrant)
- Disposable, single-use
- Must be painted with tray adhesive for retention of impression material
Impression Trays Set-up
Set-up for taking an impression. Set-up will vary depending on the type of impression being taken.
- Desired impression material
- Desired type of impression tray, tray adhesive and applicator brush
- If required, mixing spatula, mixing bowl and water measure
- Kidney dish – in case of a gag reflex when taking impressions.
- Tissues and rinse cup for patients
- Wax may be required if the tray needs to be extended
- Laboratory prescription form and laboratory bag
- Red ribbon wax.
- Equipment/materials for disinfection of impression prior to sending to the laboratory
RELATED READING
- Moisture Control in Dentistry
- Dental Elevators and their uses
- 15 ORAL SURGERY INSTRUMENTS AND THEIR USES
- Top 10 Instruments Used for Dental Extraction
- dental instruments and their uses
- 5 Measuring Devices in Dentistry and Their Uses
- 5 INSTRUMENT USED FOR RUBBER DAM PLACEMENT
- Dental Explorer: Periodontal Instrument, Dental Excavator,and their
- Dental Amalgam tray set-up (Silver-Colored Dental Fillings)
- Dental tray setup for composite fillings
- CROWN PREP TRAY SET-UP INSTRUMENTS